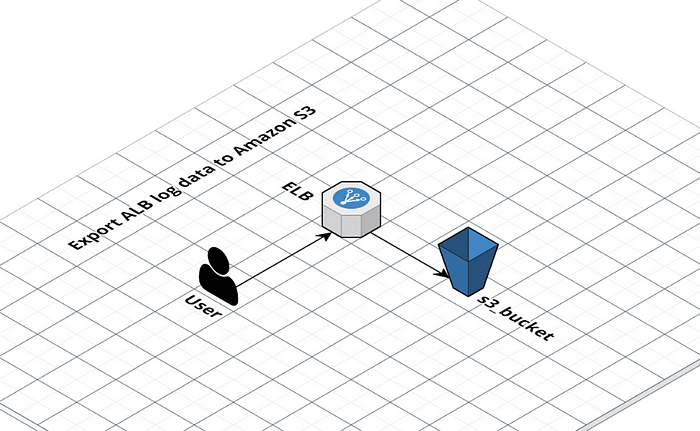
To manually create an S3 bucket using the Amazon S3 console, follow these steps:
- Go to the Amazon S3 console at https://console.aws.amazon.com/s3/
- Select the “Create Bucket” option.
- On the “Create Bucket” page, enter a unique name for your bucket. Keep in mind that certain regions may have additional restrictions on bucket names.
- Select the region where you created your load balancer for the “AWS Region” field.
- (Optional) Enable server-side encryption using Amazon S3-managed keys (SSE-S3)
- Select “Create Bucket”
- Create the subpath “prefix/AWSLogs/<AWS_Account_number>” on the bucket. Replace <AWS_Account_number> with your account number.
- To add a policy to an S3 bucket, navigate to the “Permissions” tab within the bucket’s settings in the Amazon S3 console. Then, click on the “Bucket Policy” button. In the policy editor, you will need to input or paste your policy in JSON format and make sure to update the details within the policy to match your specific AWS account and S3 bucket. Once you’ve made the necessary adjustments, click “Save” to apply the policy to the bucket.
ELB-account-ID — Replace elb-account-id with the ID of the AWS account for Elastic Load Balancing for your Region:
- US East (N. Virginia) — 127311923021
- US East (Ohio) — 033677994240
- US West (N. California) — 027434742980
- US West (Oregon) — 797873946194
- Africa (Cape Town) — 098369216593
- Asia Pacific (Hong Kong) — 754344448648
- Asia Pacific (Jakarta) — 589379963580
- Asia Pacific (Mumbai) — 718504428378
- Asia Pacific (Osaka) — 383597477331
- Asia Pacific (Seoul) — 600734575887
- Asia Pacific (Singapore) — 114774131450
- Asia Pacific (Sydney) — 783225319266
- Asia Pacific (Tokyo) — 582318560864
- Canada (Central) — 985666609251
- Europe (Frankfurt) — 054676820928
- Europe (Ireland) — 156460612806
- Europe (London) — 652711504416
- Europe (Milan) — 635631232127
- Europe (Paris) — 009996457667
- Europe (Stockholm) — 897822967062
- Middle East (Bahrain) — 076674570225
- South America (São Paulo) — 507241528517
- AWS GovCloud (US-West) — 048591011584
- AWS GovCloud (US-East) — 190560391635
AWS_Account_ID — You can find your AWS account ID in the AWS Management Console. Here are the steps:
- Open the AWS Management Console in your web browser by navigating to https://console.aws.amazon.com.
- Sign in to your AWS account.
- In the navigation bar at the top of the page, find and click on the “Support” button.
- Click on the “Support Center” button.
- In the “Support Center” page, you can find your AWS account ID on the right-hand side of the page, under the “Credentials” section.
- The Account ID is a 12-digit number and should be visible there.
- Or AWS CLI(Command Line Interface) or AWS SDK(Software Development Kit) by running commands
aws sts get-caller-identitywhich will return a JSON object containing the account details including the account id

The final bucket policy should be like this
{
"Version": "2012-10-17",
"Statement": [
{
"Effect": "Allow",
"Principal": {
"AWS": "arn:aws:iam::<ELB-account-ID>:root"
},
"Action": "s3:PutObject",
"Resource": "arn:aws:s3:::<s3_bucket_name>/prefix/AWSLogs/<AWS_Account_ID>/*"
},
{
"Effect": "Allow",
"Principal": {
"Service": "delivery.logs.amazonaws.com"
},
"Action": "s3:PutObject",
"Resource": "arn:aws:s3:::<s3_bucket_name>/prefix/AWSLogs/<AWS_Account_ID/*",
"Condition": {
"StringEquals": {
"s3:x-amz-acl": "bucket-owner-full-control"
}
}
},
{
"Effect": "Allow",
"Principal": {
"Service": "delivery.logs.amazonaws.com"
},
"Action": "s3:GetBucketAcl",
"Resource": "arn:aws:s3:::<s3_bucket_name>"
}
]
}
Configure access logs
To configure access logs for your load balancer, follow these steps:
- Open the Amazon EC2 console at https://console.aws.amazon.com/ec2/
- In the navigation pane, under Load Balancing, select Load Balancers
- Select the load balancer you want to configure
- In the Description tab, click on Configure access logs.
- On the Configure access logs page, select Enable access logs and leave the Interval as the default of 60 minutes.
- For the S3 location, enter the name of your S3 bucket, including the prefix(for example,
s3://<bucket_name>/prefix ). You can use an existing bucket or create a new one. - Click on Save to complete the configuration process. Note: If you haven’t created the S3 bucket yet, you can choose to have Elastic Load Balancing create the bucket and add the required policy. If you are using an existing bucket, make sure you own the bucket and have added the required bucket policy.