In the realm of software development, ensuring consistent behavior across different environments is crucial. It’s a common dilemma: your application works perfectly on your machine, but when you try to run it elsewhere, suddenly it breaks due to a missing library or some other discrepancy. This is where Docker comes into play, offering a solution that streamlines the process of creating, deploying, and running applications.
What is Docker?
Docker is a cutting-edge tool that leverages the concept of containers. Imagine putting your application into a box, alongside all its dependencies, libraries, and required components. This “boxed” version of your app is what we refer to as a container. With your application now containerized, it can be transported and run seamlessly on any other Linux machine, eliminating the “it works on my machine” issue.
How Does Docker Achieve This?
At its core, Docker harnesses the containerization features built right into the Linux kernel. These containers are both lightweight and portable. One significant advantage of using Docker containers is their isolation capability: multiple applications can coexist on a single host without stepping on each other’s toes. Moreover, Docker ensures that deploying applications remains a consistent process, regardless of where you’re launching them.
The Docker Ecosystem
Beyond merely containerizing applications, Docker boasts a rich suite of tools and services tailor-made for the entire lifecycle of containerized apps. Central to this ecosystem is:
- Docker Engine: This is the heart of Docker. It’s the underlying runtime that allows you to create and manage containers. While it originally ran only on Linux, recent iterations also support Windows.
- Docker Hub: Think of this as a vast library or repository. Docker Hub is a cloud-based service where developers can store, share, and even collaborate on Docker images.
In this example we are using MongoDB container and AWS cloud
After provisioning EC2 instance attach secondary disk to instance and mount to linux file system.
yum update -y && yum upgrade -y
mkdir /data
mkfs -t xfs /dev/xvdb
mount /dev/xvdb /data

##add /etc/fstab following line
/dev/nvme1n1 /data xfs defaults 0 0
after attaching the secondary disk now is time install docker and append ec2-user to docker group
docker install

sudo yum install docker

sudo usermod -a -G docker ec2-user

id ec2-user
Install docker composer on amazon linux 2
##docker composer install
wget https://github.com/docker/compose/releases/latest/download/docker-compose-$(uname -s)-$(uname -m)

sudo mv docker-compose-$(uname -s)-$(uname -m) /usr/local/bin/docker-compose

sudo chmod -v +x /usr/local/bin/docker-compose
Okay. Now start docker service
sudo systemctl docker start

sudo systemctl docker enable

sudo systemctl docker status
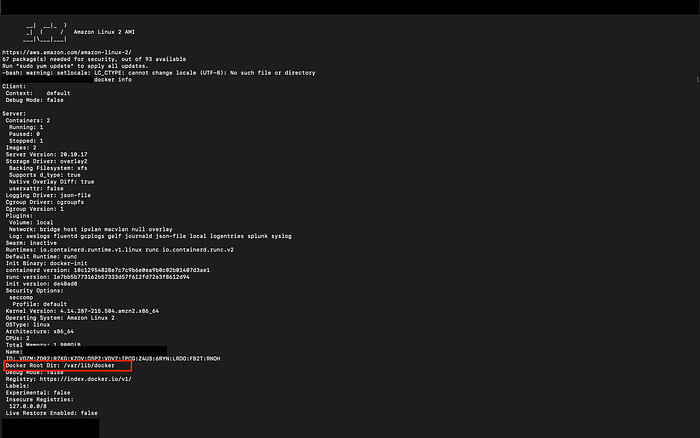
First we check docker info
docker info

Output of docker info you can find out Docker root Dir default is /var/lib/docker
Before we changing the Root Dir we have to stop docker service.
systemctl docker stop
After that add following line to the cat /etc/docker/daemon.json for example I used directory call data. this directory path may be deferent from mine.
{
"data-root": "/data"
}
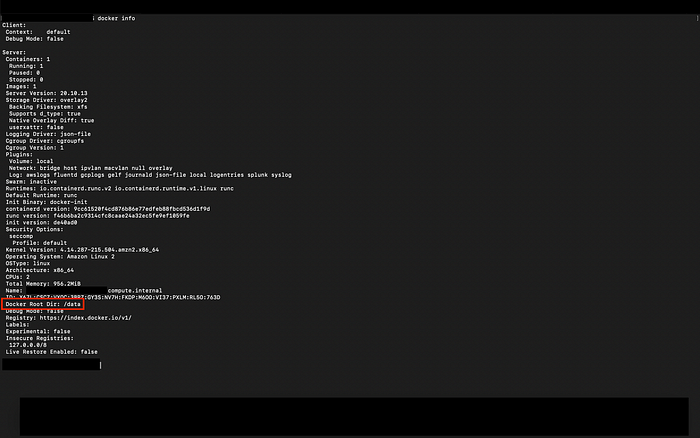
once update detail verify changes. start docker service and enter docker info commond again

Comments